
If the heating element is used for long periods of time at high heat, the heating element may burn up, causing a wax to leak through a small hole burnt in the bottom and will need to be replaced. Luckily, this part is fairly inexpensive and made to be easily replaced in 5-10 minutes. Please see the steps below.
NOTE: You must unplug the melter before replacing the heating element. It is recommended to hire an electrician to replace for safety.
You can also see larger colored pictures of this process on our website:
Step 1: Unplug the melter and pull off the bottom black base.
Step 2: Use Phillips Screwdriver to Remove Screw on Each Side of Heating Element
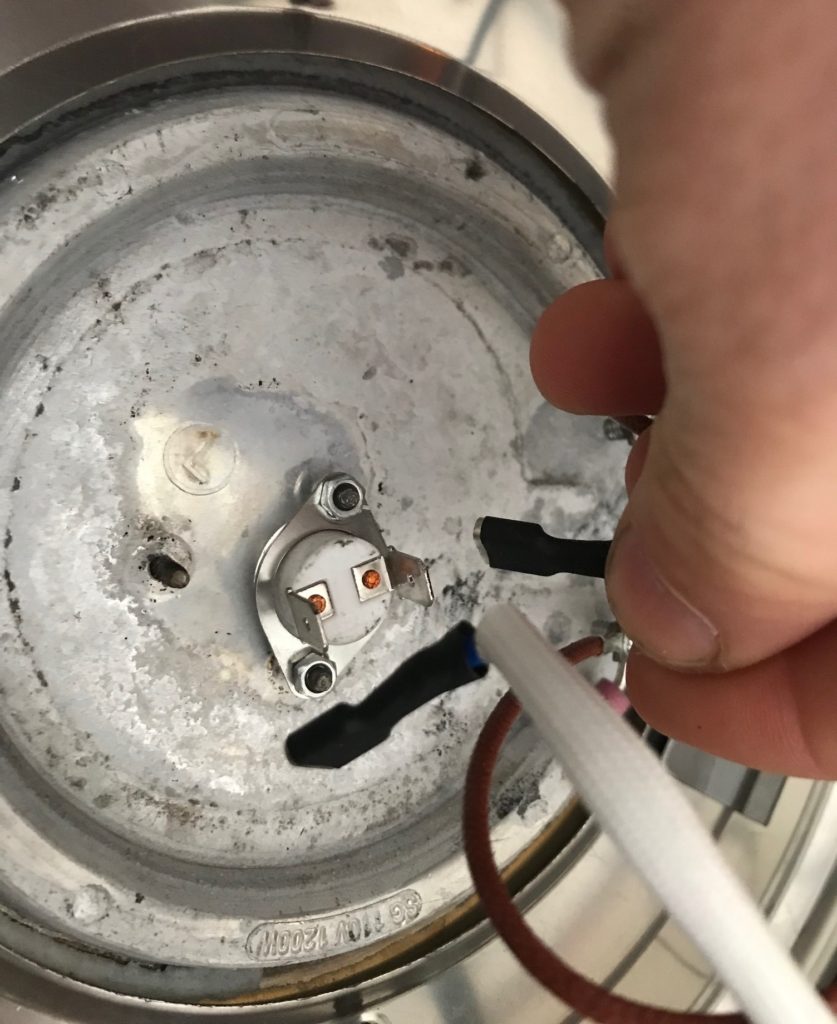
Step 3: Pull to Unplug the Middle Two Wires from the Connector
The connectors are sometimes hard to unplug. In this case, use pliers to grip and pull. ONLY grip around the connector.
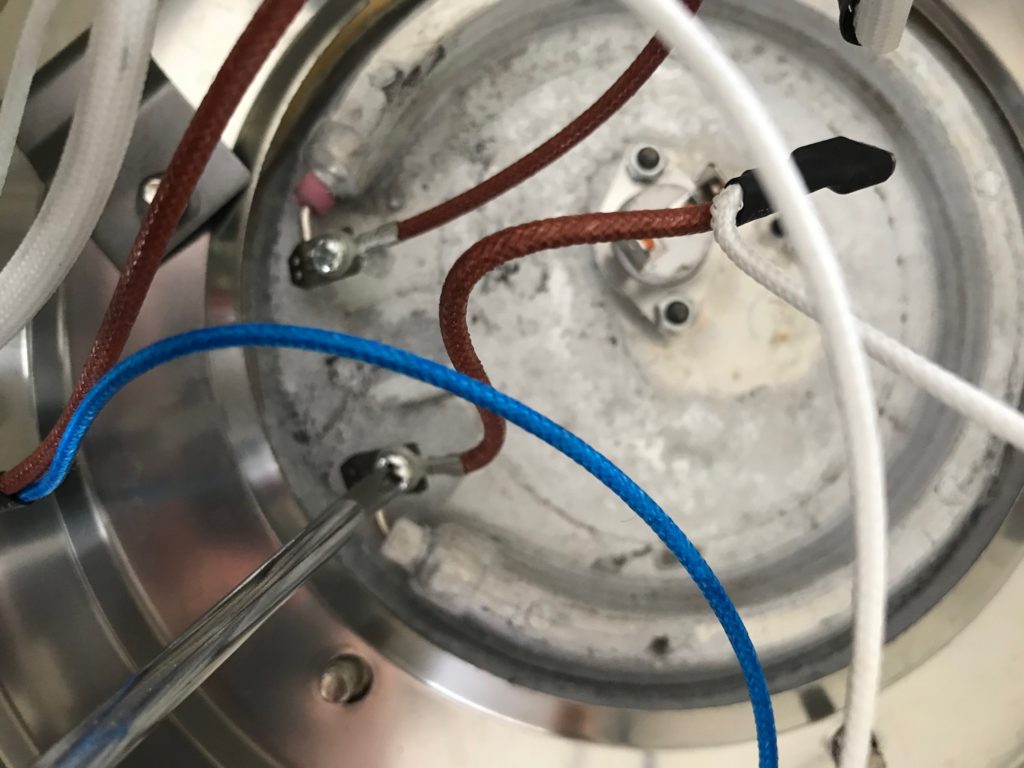
Step 4: Loosen 6 Nuts Around Heating Element and Remove
Note: The nut is an 8mm. You can use a socket wrench. If you don’t have one, you can even use pliers or an adjustable wrench.

Step 5: Try to Clean All Wax Residue Inside with a Paper Towel Where the Seal will sit.
You can use rubbing alcohol with the paper towel to help remove residue.
Step 6: Insert New Heating Element while ensuring Seal is in Place Around Groove.
Re-tighten all 6 nuts to hold in heating element. It is best to tighten each nut little by little in a crisscross pattern until they are all tight such as below.
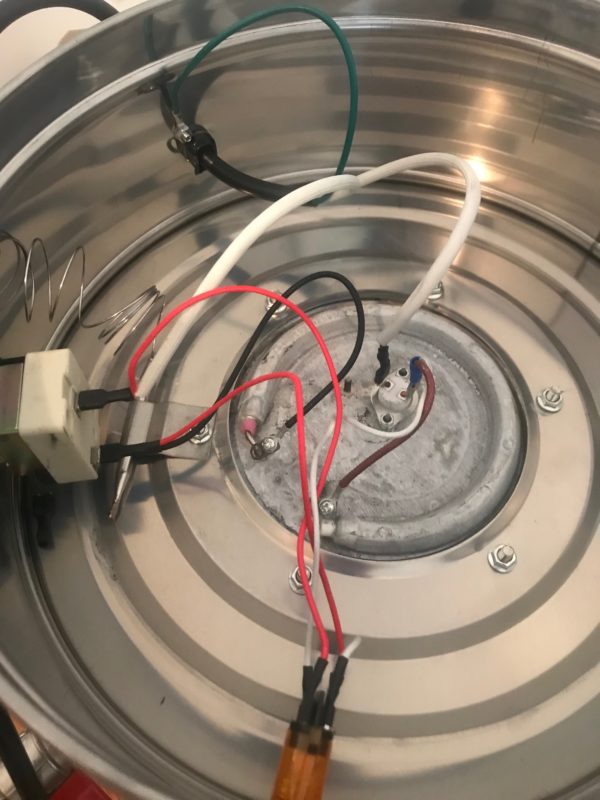
Please see the below photo of the correct wiring.
The manufacturer used different colors from time to time, but you can follow the wires in the below photo to make sure if looks correct.
Leave A Comment